Creating a 3D Ubuntu Logo in Blender - A Basic Guide
This is a basic guide for beginners on how to to create a 3D Ubuntu logo in Blender, or at least how I went about it. I'm a novice using Blender myself, and there are probably other ways to go about this, but I thought that this could help Ubuntu users who are new to Blender get a little familiarized with it while making something relevant to their interests. I tried to include as much information as I could in this guide on the basic usage of Blender.
Consult the Blender Wiki documention for more information on using Blender. Instructions on how to move around in the viewport (zooming, panning, etc.) can be found in the Noob to Pro wikibook. (The page on The 3D Viewport Window doesn't mention this, but to scroll the model up, down, and side-to-side in the viewport use the Shift key along with the same NUM keys used for panning). I don't know much about the mouse scroll method since it doesn't work well on my laptop.
Note to laptop users: if the NUMLOCK isn't engaged, pressing the 8-key will switch the 3D Window to another layer. You just need to go into Object Mode and click back on the first one. (I've also found that if I inadvertently hit the normal "-" key instead of the NUM"-" key Blender will crash, and had to kill blender.bin in the processes.)
I also used the "BlenderBasics2-42a.pdf" guide, an excellent guide created by James Chronister. I originally found the guide on the Central Dauphin High School site > Academics > Drafting Technology. (Included for convenience with respect of the publication's author(s) and licensing.)
Now to get started:
The default cube will be present when Blender is launched. Press the X-key to delete it. You can toggle the Transform Widget (red, green, & blue widget) on/off using the "Use 3d transform manipulator" button (the button with the little hand).
In Object Mode, first aquire and load a reference image as shown in this Blender Wiki tutorial. (I just got a stock Ubuntu logo and cropped/scaled it down to 300x300.) When I loaded mine the lamp was in the way, while in Object Mode right-click to select it and then press the G-key to grab and move it. Its position can be adjusted later.
One quick note here: When a new mesh is added in Edit Mode it will become part of the existing object (which is what we want here). When a new mesh is added in Object Mode it will be added as a seperate object. (That may not make sense right now but just keep it in mind.)
We'll start with the outer edge of the large circle. Press the Tab key to enter Edit Mode, then go to Add > Mesh > Circle. I made it 99 vertices with a radius of "3". (The odd number of vertices worked better when lining up with the edges of the indentations for the smaller outer circles.)
Note: While in Edit Mode, you can undo an operation by pressing Ctrl+Z. Use the A-key to select/unselect all the vertices.
Press the G-key to grab and move the mesh circle to the approximate center, and press the S-key to scale it to the size of the outer edge of the large circle. I rotated it a little (R-key) so that a vertices was close to each edge of the indentations.
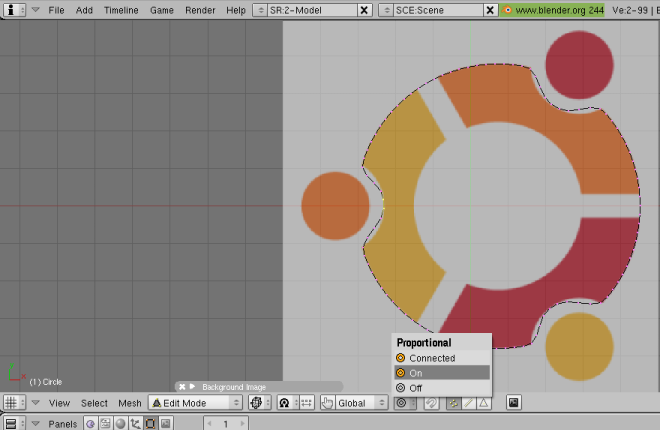
Now to make the indentations for the small outer circles. (There's probably a better way to do this!) I first used the Proportional Vertex Editing tool to create a basic smooth curve to start with and adjusted it manually to fit the curve. (Select a vertice in the center and use the NUM+ or NUM- or the middle mouse wheel to adjust the amount of effected vertices.)
This is a good time to save your work. Blender won't prompt you to save when you close it. Save often so as not to forget. It's also a good idea to save your file under different names as you proceed through the steps.
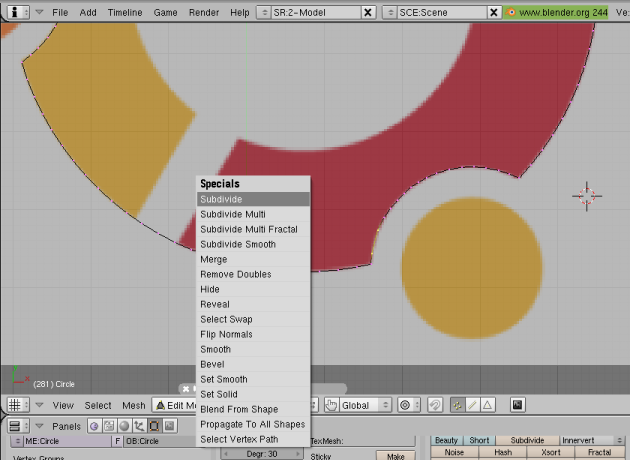
I added more vertices as needed to smooth the curve. To add a vertices, right-click (RMB) on the first then Shift+RMB on an adjacent one, hit the W-key and select "Subdivide", a vertices will be inserted between them. Press the A-key to deselect all the vertices then RMB to select the vertice you want to adjust, G-key to move it. (The Arrow keys work well to make small adjustments.)
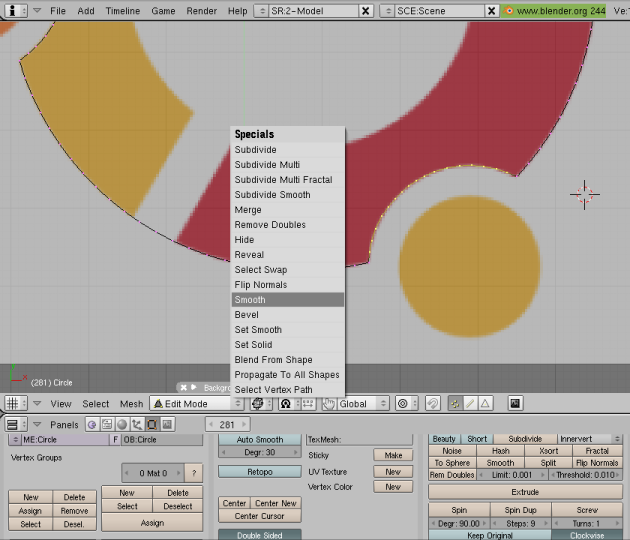
You can also try the Smooth tool to smooth the curve better. Select all the vertices in the curve by pressing the B-key twice (BB) - the size of the Circle Select tool can be adjusted with the NUM+ or NUM- or the middle mouse wheel, then left-click to select and right-click to remove the Select tool. Press the W-key and select "Smooth".
(Note: Multiple vertices can also be selected one-by-one. Select the first one and Shift+RMB on the rest.)
After doing the indentations we can add the inner edge of the large circle - Add > Mesh > Circle. I just used the default 32 vertices and a radius of "2". Move and scale into position.
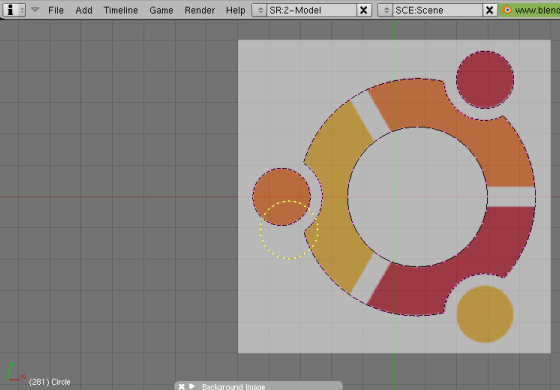
Add the small outer circles. Once you get the first one scaled down to the proper size you can duplicate it by pressing Shift+D. The duplicate will automatically be "grabbed" so just move it to one of the other positions. Do the same for the third.
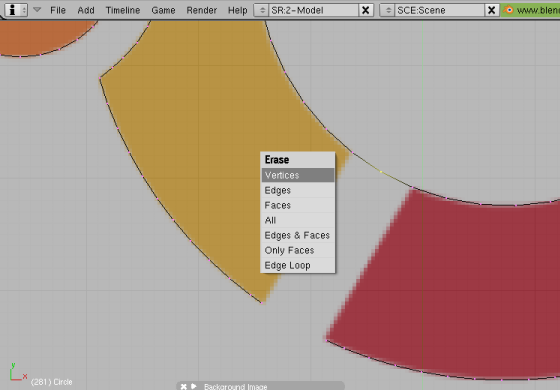
Now to make the "cutouts". Add and/or adjust vertices as necessary in order to have one close to each of the edges (select adjacent ones and subdivide). To remove a vertices, select it and press the X-key to delete it. Remove the vertices in the middle of the cutouts.
Create the new edges needed to close off the sections of the logo. Select the two vertices that need connected and press the F-key to create the new edge. (Not in screenshot.)
Filling the mesh and extruding:
|
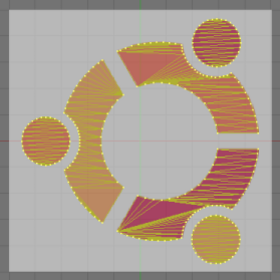
To fill in the mesh, press the A-key to select all of the mesh. Then press Shift+F. Note: When I went back to create a bevel I had problems with the faces in the top section of the logo when it was rendered. Using the "Edge Select Mode", I deleted some of the edges and manually re-created the faces more uniformly (selecting 3 adjacent vertices and pressing the F-key). The changes are reflected in the screenshots below. |
|
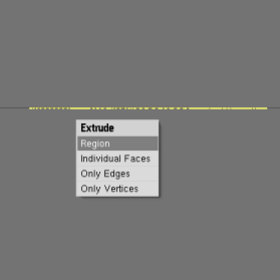
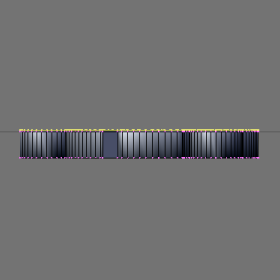
To extrude the mesh press the NUM2 key to rotate the view to the side. Press the E-key and select "Region". After extruding you can go to Render > Render Current Frame and see what it looks like. (This would be a good time to save the file under another name.) |
Smoothing the sides:
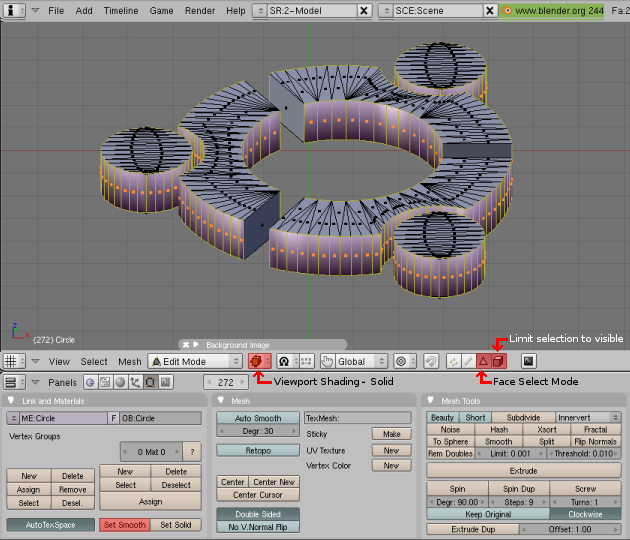
Initially there will be ridges spaced around the side faces of the logo that will be noticeable upon rendering. To smooth them out, while in Edit Mode activate the "Face Select Mode" (see screenshot) to select the individual faces. (It will be easier with the "Viewport Shading" set to "Solid", and the "Limit selection to visible" option enabled.) They can be selected the same way multiple vertices are selected, using the Circle Select tool (BB). Individual faces can be selected (or unselected) using the Shift+RMB. Use the panning function to turn the logo around as needed to access all the faces that need selected for smoothing. (There might a better way of doing this, or a way to prevent it from happening.)
Once all the side faces that need smoothing are selected you can click the "Set Smooth" button under the "Links and Materials" panel in the Button Window (highlighted in red). Try rendering it to see what it looks like.
Beveling the top:
|
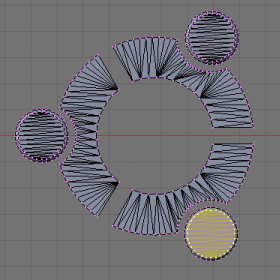
To create a bevel for the top edges, first go to the Top view and click back on "Vertices Select mode". Select all the top vertices. Rotate it to the side view and extrude it just a little. The "Viewport Shading" should still set to "Solid", and the "Limit selection to visible" option still enabled. |
|
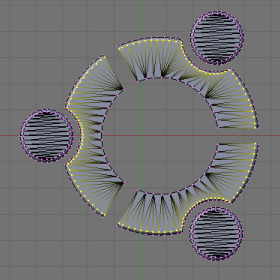
Go back to the top view and use the Circle Select tool (BB) to select the newly extruded vertices of each of the outer circles. Press the S-key (scale) and use the mouse or arrow keys to move it in a little. (You can press and hold the Ctrl key for a contrained scale). Remember to unselect the vertices (A-key) before moving to the next. |
|
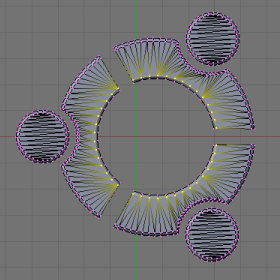
Select all the vertices on the outer part of the large circle and scale.
(Constraining the scale didn't work well here for me. I just made it roughly equivalent to the small circles.) |
|
Do the same with the inner part of the large circle. |
The final touches:
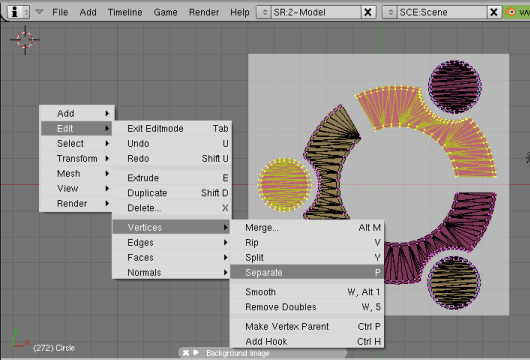
To prepare the logo for the colors (Materials & Texture), it needs to be divided into a separate object for each material (color) to be applied. While in Edit Mode use the Circle Select tool (BB) to select the parts that are to be the same color. Press the Space Bar and select Edit > Vertices > Separate, and then take the "Selected" option. Do that for all three colors.
To color it enter Object Mode (Tab key) and create, name and apply the Materials to each of the separate sections (Orange: #FF6309, Yellow: #FFB515, Red: #C90016). There's good information on applying materials in the BlenderBasics2.42a guide (page 33). The material can be made reflective to varying degrees as well. I've tried the settings (but adjusted somewhat) for a chrome material. There's also information on creating reflective surfaces in this feeblemind.tuxfamily.org guide.
A background scene or image can be added for the render. Chapter 6 of the BlenderBasics2.42a guide (page 42) explains that well. It can also be rendered with transparent background (in Object Mode, select Scene - Render, then under "Format" set the file format as PNG and click the "RGBA" button). The camera and lighting can be adjusted in Object Mode (that takes a little trial & error to learn it).
|
|
|


|